Do you want to share your passion for Mermaids with the world? Get ready, you’re about to learn how to start a mermaid blog.
There are so many doors that can open by having a blog. Your blog can focus on Mermaid tails, photography, or even birthday parties! What part of the mermaid community are you passionate about?
“Light yourself on fire with passion
and people will come from miles to watch you burn.”
– John Wesley
In this tutorial you will learn how to set up a blog, in less than 15 minutes by:
- Choosing a domain name, and how to get it for FREE!
- Setting up a web host for less than $4 a month.
- Installing WordPress with 1 click.
- Congratulating yourself!
Let’s dive in!
How to start a mermaid blog

Step 1: Come up with your domain name
The domain name is the URL people enter into their web browser to find you. I suggest using the word “Mermaid” somewhere so people quickly understand what your website is about.
If you sign up with Bluehost, you get a domain name FOR FREE! It’s super easy and simple to sign up. Keep reading for details.

Step 2: Set up a web host
A web host is where you put your blog on display. I strongly recommend Bluehost as a quality platform to start your blog off on the right foot (or fin)! They also have some great perks with signing up!
- Free domain name
- Free site builders
- 1 click WordPress install
- 24/7 support
Click here to start the process!
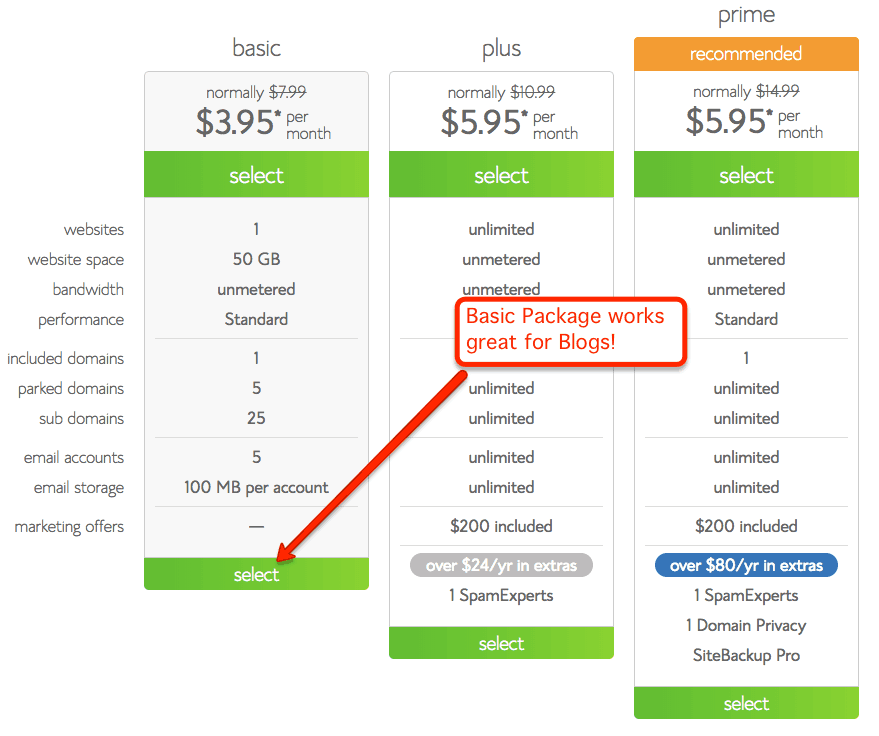
After you click the big green button, you will see 3 basic plans. I recommend starting out with the lowest per month, you can always increase it later if needed. At this stage of the game a basic plan is perfect for you.
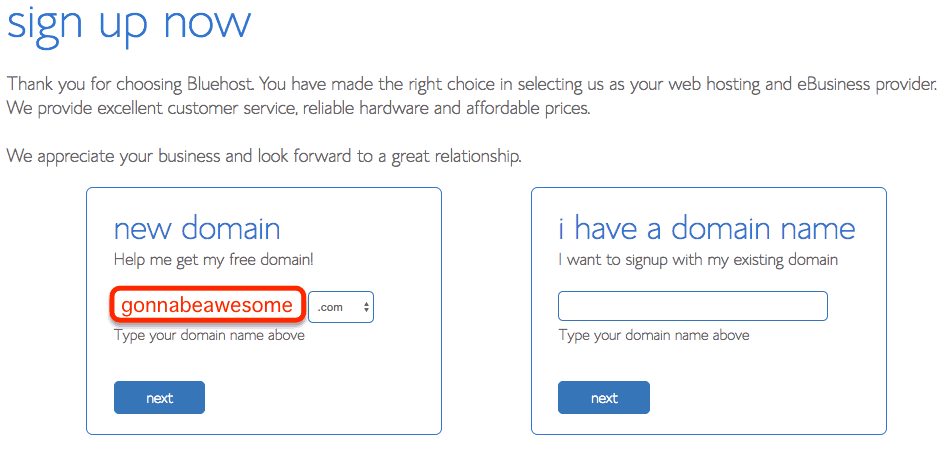
Next, it will ask if you already have a domain name or want to choose one through them. Enter your desired domain name and click next.
Enter your information, you’re almost there!
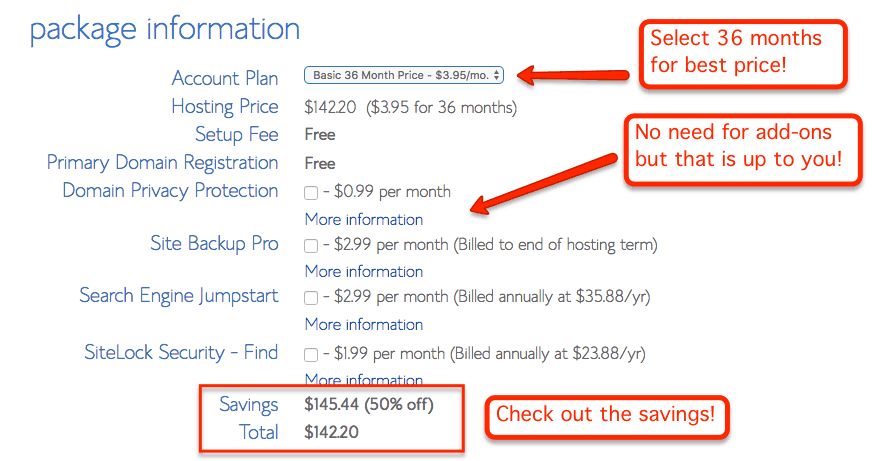
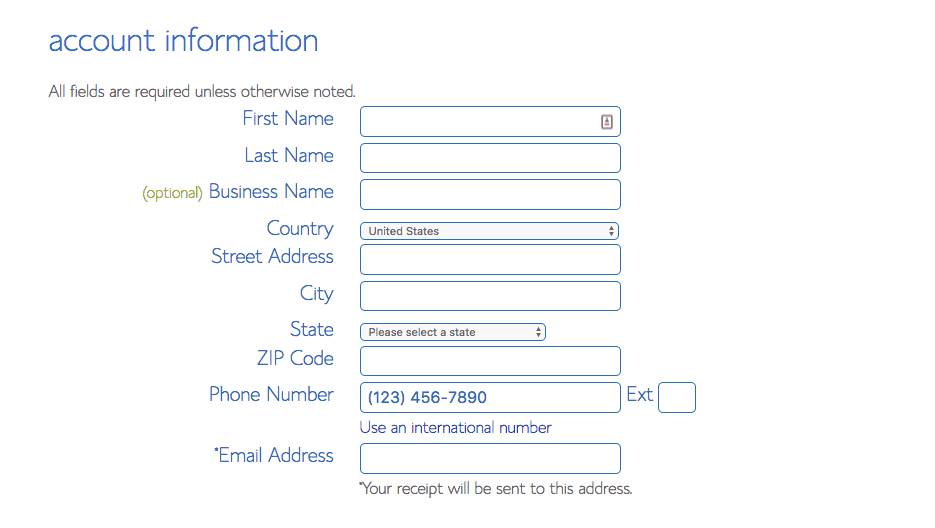 Choose from the packages provided. Committing for 3 years is the easiest way to save money with setting up your website. Who doesn’t love that? You save on money and don’t need to worry about renewing for 3 years.
You also have options to click some add-ons but I don’t. That is up to you!
Last but not lease, enter your payment information. Bluehost will then email your WordPress login information.
You are so close!
![]()
Step 3: Install wordpress with one click
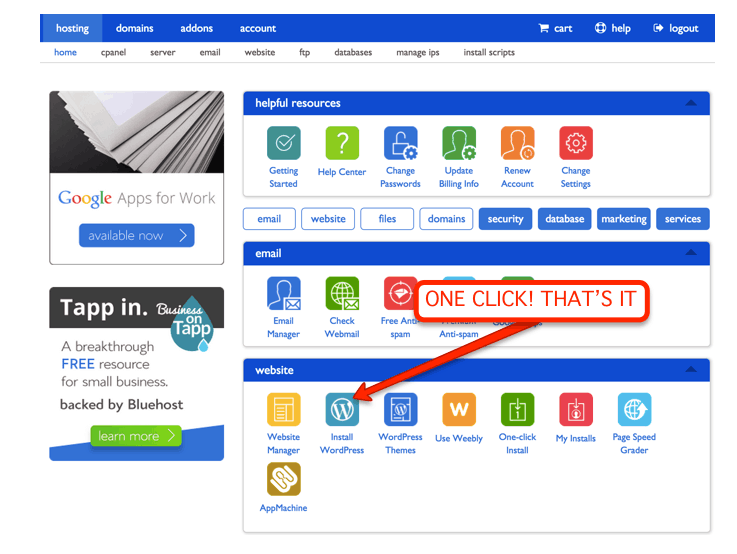
Open the email from Bluehost and log in. From there, you are a few clicks away from being done. Don’t get overwhelmed by all the buttons on your dashboard!
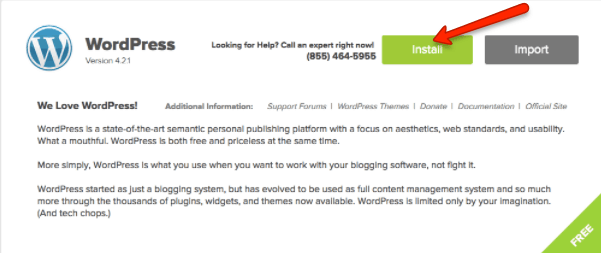
Find the website section and click on “Install WordPress.” You will be taken to another page, click install and select your domain (leave directory part blank). Click on your mermaid domain and relax, this part takes a few minutes.
Once your installation is complete you will see a buttons saying “view credentials” You will see your WordPress Username and password. Click the URL and BAM, log into WordPress! Great job!

Step 4: Congratulations are in order!
You did it! Get to work uploading pictures, posting experiences and expanding your reach within the mermaid community. Your ability to shine has just expanded world wide. I hope you are excited!
I want to know what your website is called! Comment below so I can see your Mer-fabulous self, and what you have been working on.
Today is a great day to start living your dreams




Cynthia
January 3, 2018I have a mermaid blog!! Thanks for posting this, as I’m sure other mermaids will benefit from this step by step outline! Also, some new posting ideas !! My website is http://www.cynthiaberenyi.com and a mermaid boom is on the way!!
Cynth Mermaid
Everything Mermaid
January 4, 2018Nice to meet you Cynthia! Great website!
Mermaized
September 14, 2018Hello,
I am a French blogger writing in English.
I just started my blog about my love for the sea and mermaids 🙂
I’d love to share my passions with more people.
https://mermaized.blogspot.com/
Mermaized 😉
Everything Mermaid
September 14, 2018Looks like a great start! Keep it up! I love writing for my blog. It’s like a little mermaid escape every time I dive in!